Integrating Recomi AI Agent with Slack
Recomi makes it quick and effortless to integrate an intelligent AI-powered agent into your Slack workspace. By adding Recomi to Slack, your team can instantly tap into advanced AI capabilities, streamlining workflows and enhancing collaboration. In just a few minutes, you can deploy a Recomi AI agent across your company’s Slack channels to improve communication, boost efficiency, and elevate the employee experience. The AI agent understands natural language, answers common questions, resolves issues, retrieves information, and provides 24/7 automated support—all within Slack. How to integrate a Recomi AI agent into your Slack workspace:Step 1: Setting Up Your Recomi AI Agent
To integrate a Recomi AI agent into your Slack workspace, start by logging into your Recomi account. If you don’t have an account yet, you can create one for free. After logging in, configure your agent within the Recomi platform by uploading relevant data sources, such as text file, documents, which will help the agent build its knowledge base.Step 2: Navigate to the Slack Integration
- Once you have a Recomi account and an AI agent set up, head over to your dashboard. On your dashboard, you’ll find a list of all the agents you have created. Locate and click on the agent you wish to integrate with Slack.
- After clicking on an agent, the agent detailed page should come up, click on Integration at the top of the page and then the Integrations tab on the left side of the page. This will take you to a page with a list of integration options.
- Click on Connect under the Slack card

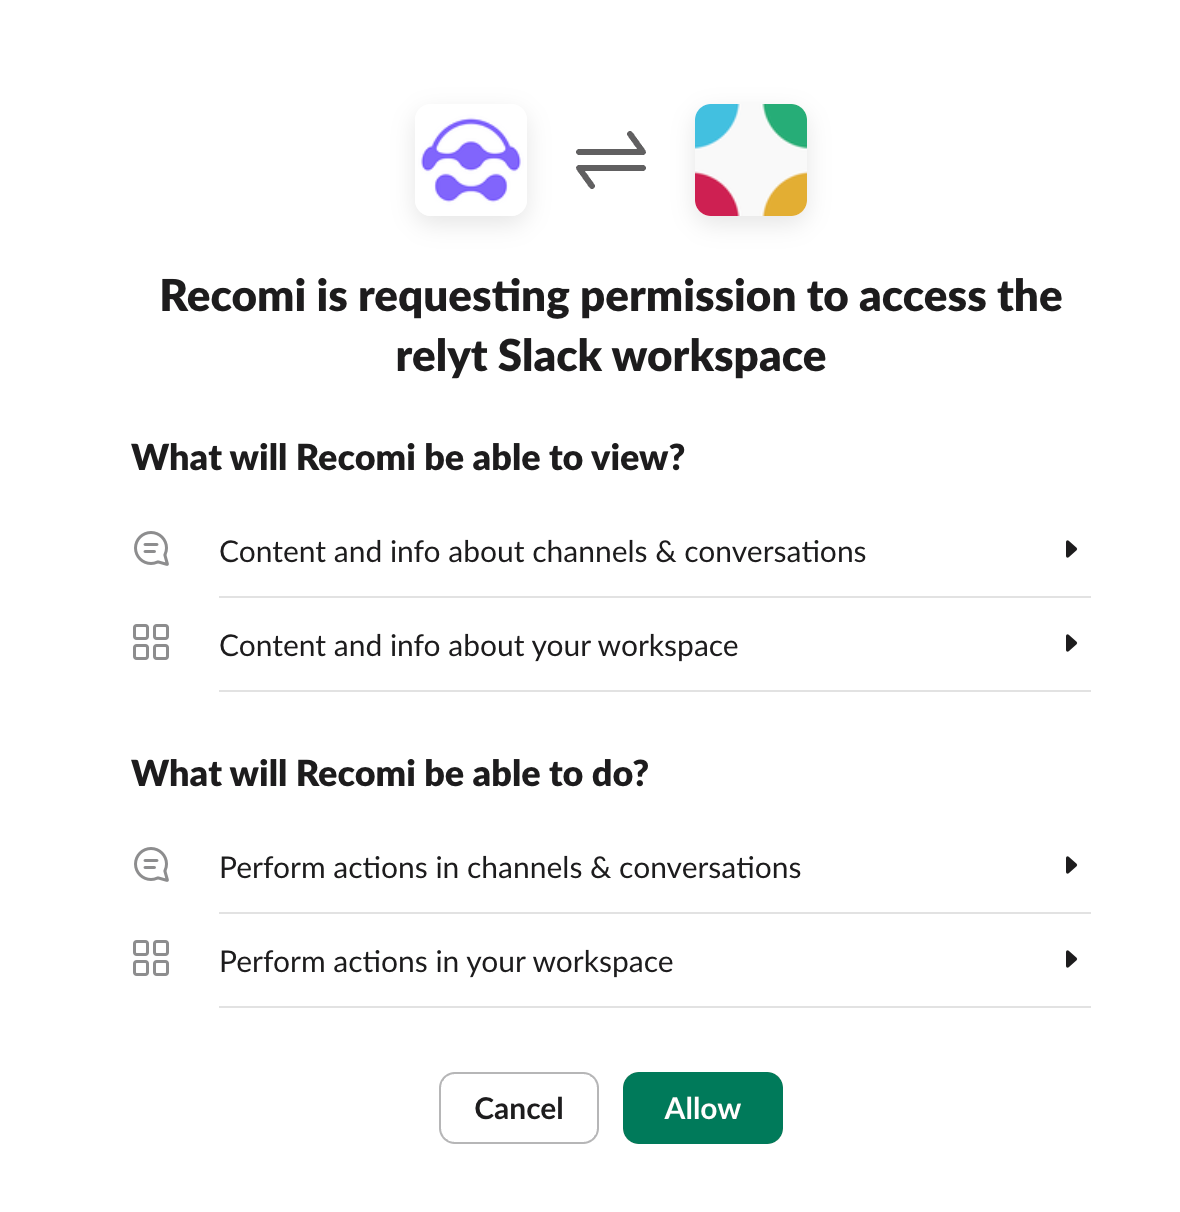
- Then you’ll be asked to authorize Recomi to access your Slack account and workspace. Scroll down and click on Allow.
- If all goes well, you should get a message saying Recomi has been successfully added to your workspace.
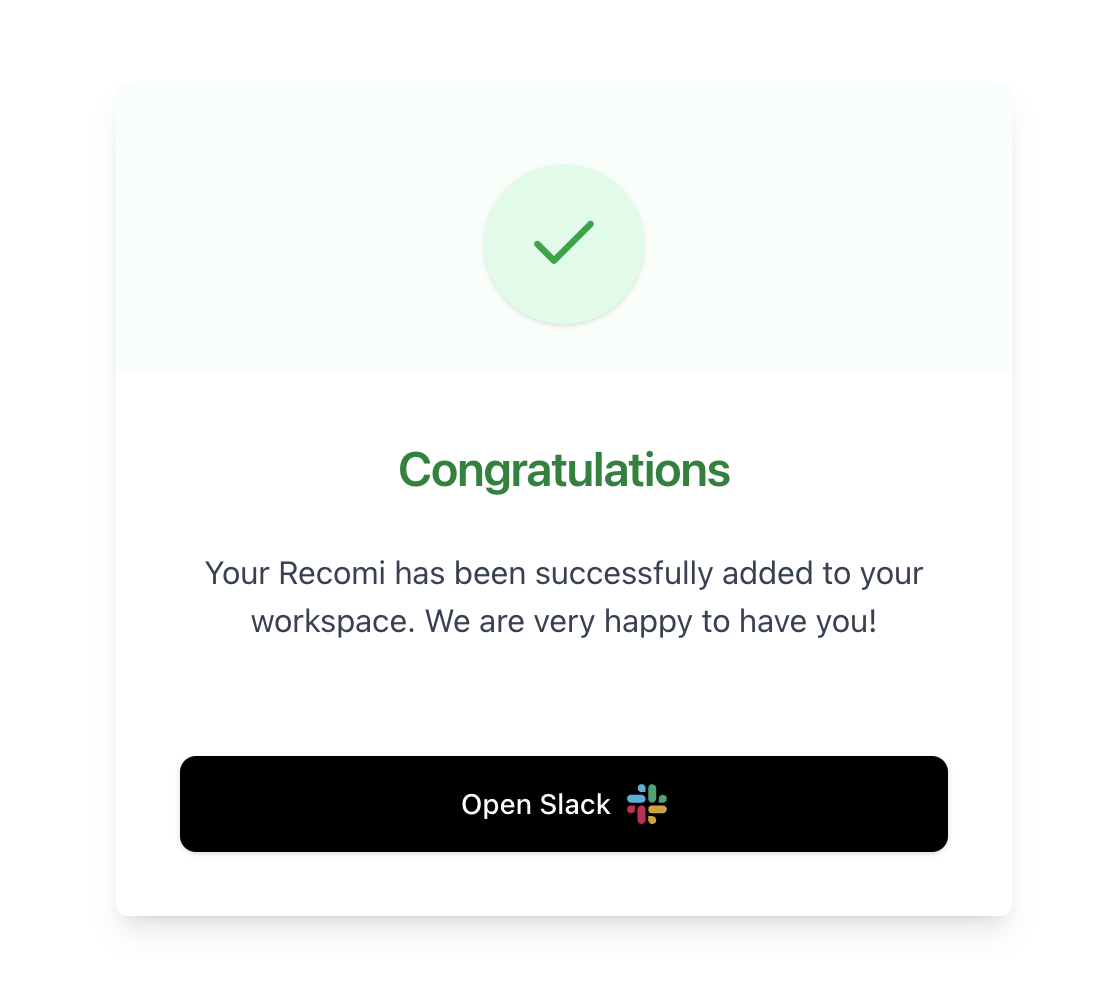
- Click on Open Slack to launch your Slack workspace. You’ll be prompted to sign into your Slack workspace or select from a list of Slack workspaces you are currently signed into. Click open beside the target workspace.
Step 3: Add Slack chatbot to a channel
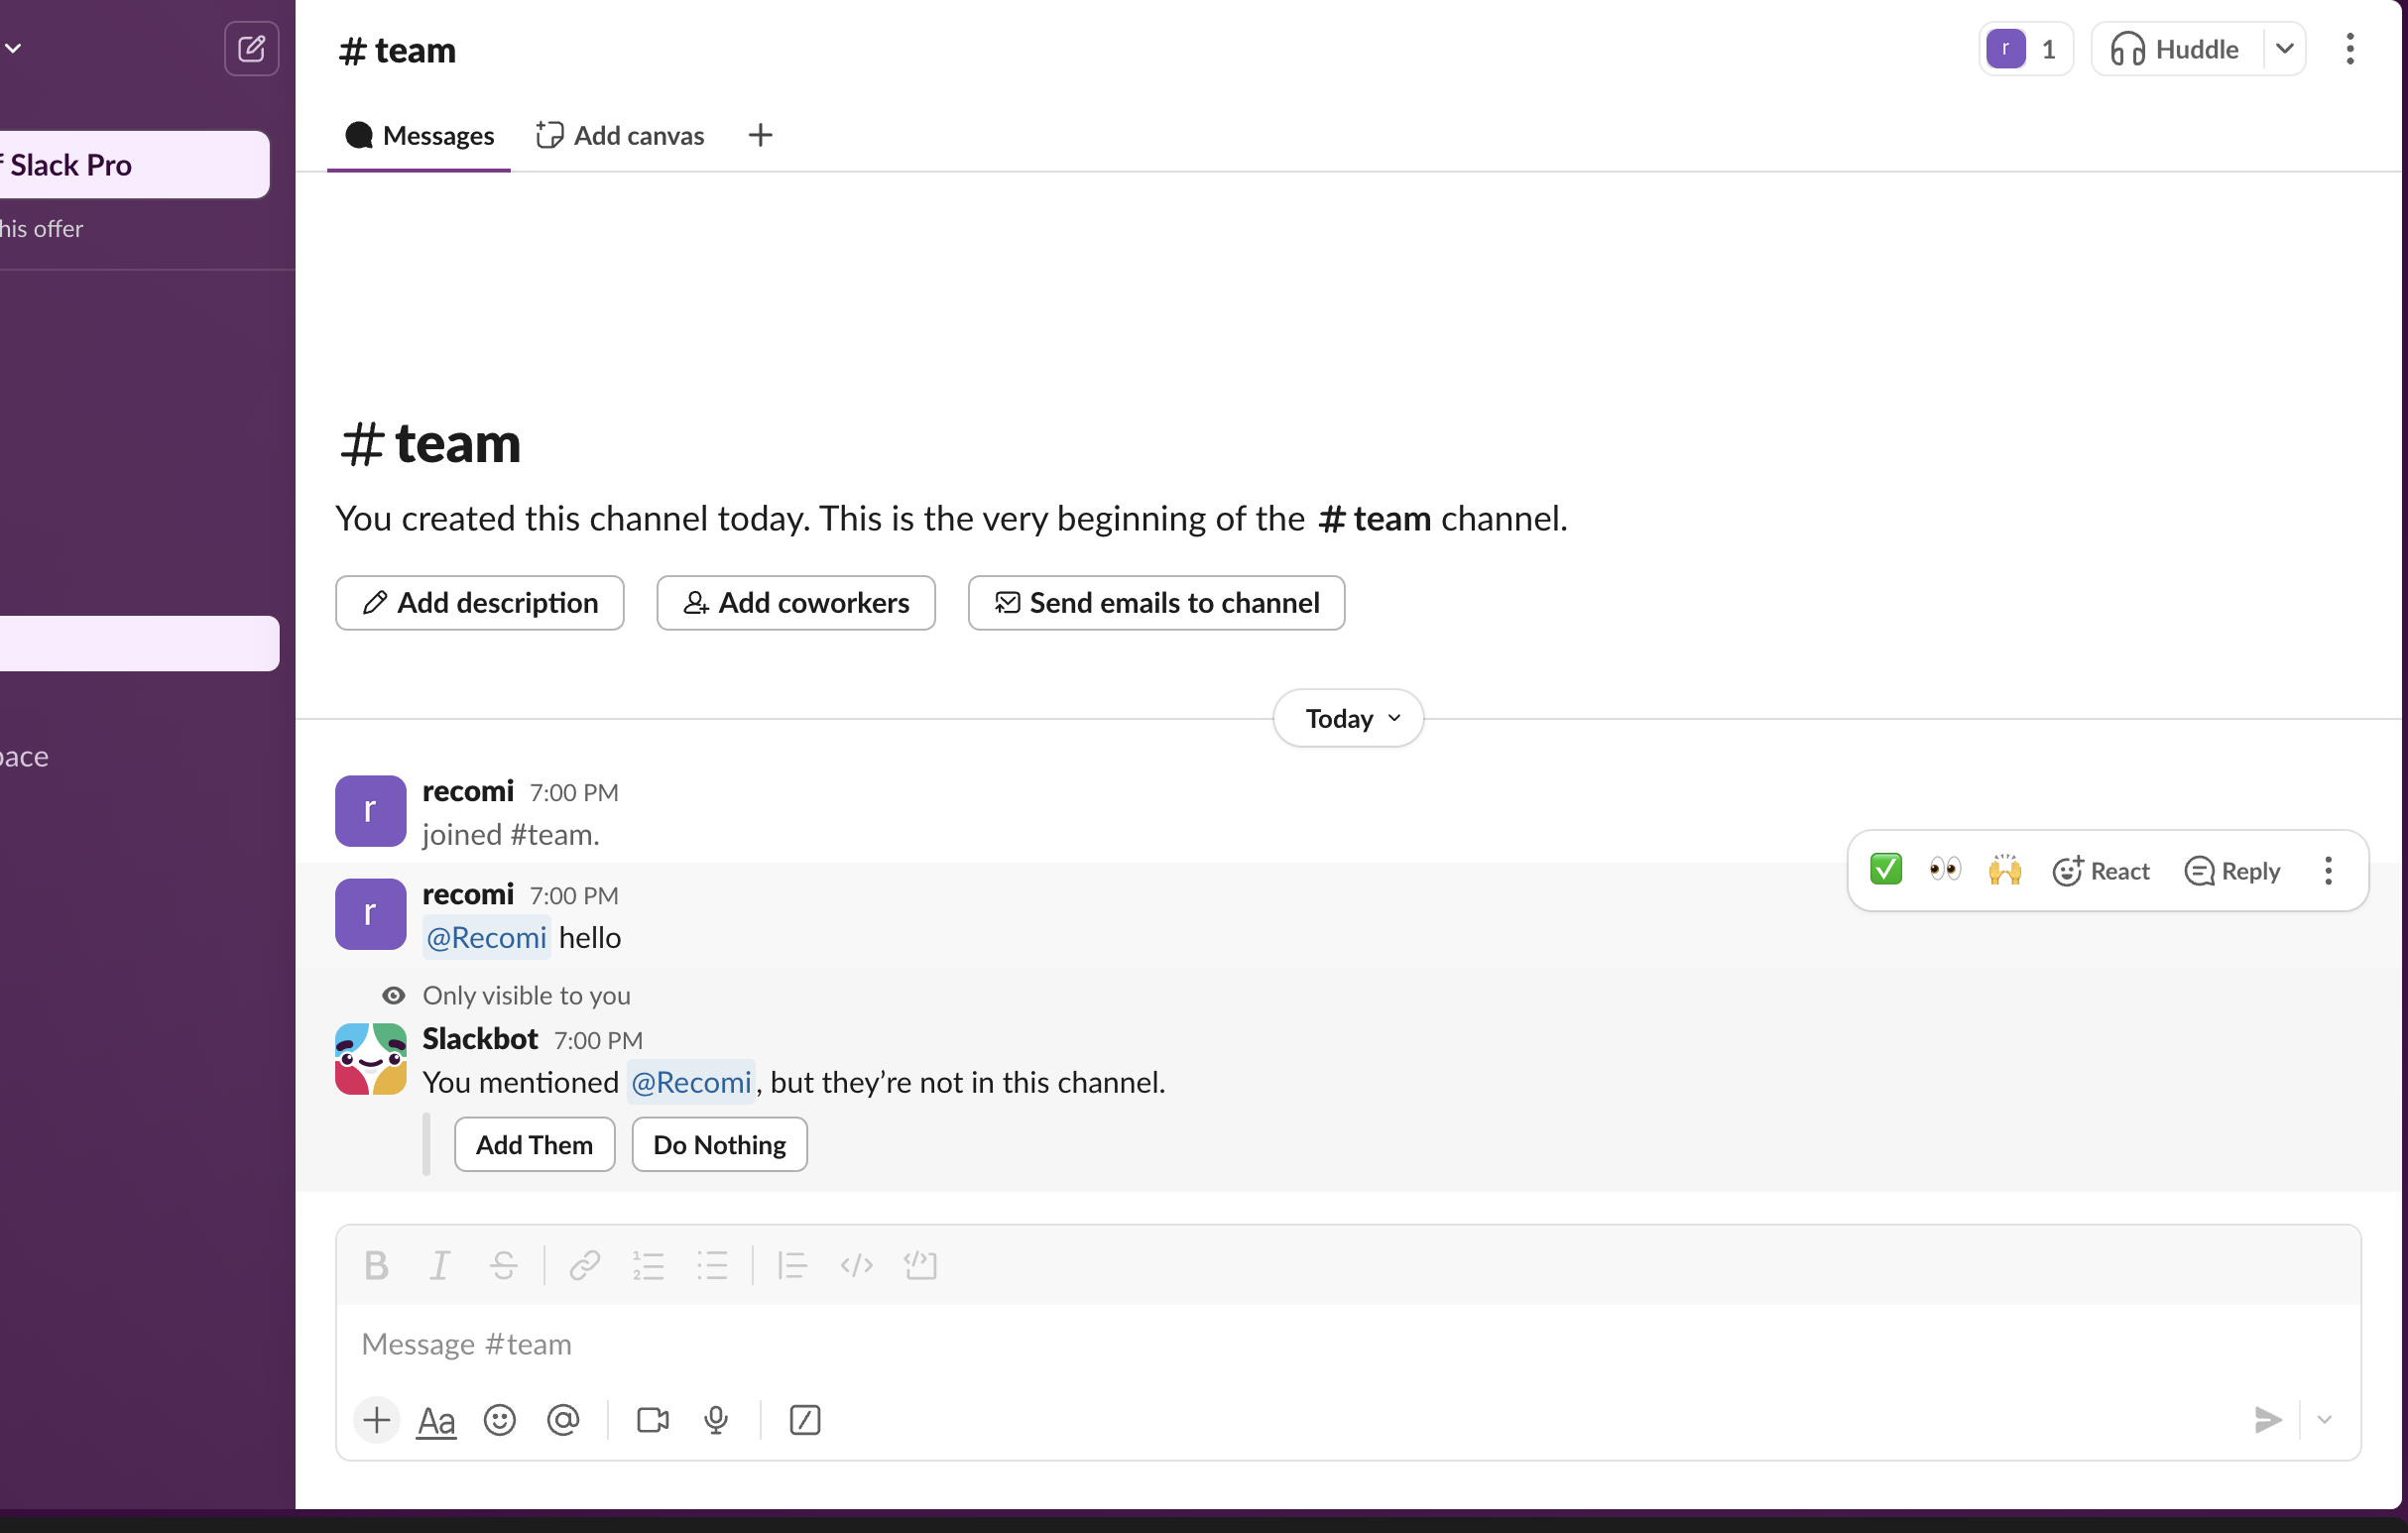
Once you’ve launched the Slack workspace that hosts your Recomi AI agent, you can start setting up the chatbot as a Slack bot. To do this:- Open any channel on your Slack workspace, and type @Recomi followed by any question related to the purpose of your chatbot. This should initiate a prompt by Slack asking you to invite the chatbot to the channel or take no action.
- Click on Add Them. The chatbot will then be available in the channel to answer any questions you might have.
That’s it! Your Recomi AI agent is now integrated and ready to elevate team communication in your Slack workspace.Anytime you or any member of your team needs a question answered, just type @Recomi followed by your question, and your chatbot will respond. Team members can direct questions to your intelligent bot in any channel or DM (direct message) that has the bot. The chatbot provides helpful responses powered by conversational AI, giving your team access to an advanced virtual assistant 24/7.
AI Agent maps to Slack workspace bot
Notes: the Recomi is registered as a bot in the Slack workspace with the name “Recomi”. Each Slack workspace can have only one Recomi bot, which is mapped to a Recomi AI agent. If you want to switch the Recomi AI agent that the bot in the Slack workspace is mapped to, you need to disconnect the current Recomi AI agent from the integration in Recomi and connect a new Recomi AI agent you want to use to this Slack workspace again. The following image shows this mapping logic between Recomi AI agent and Slack workspace bot.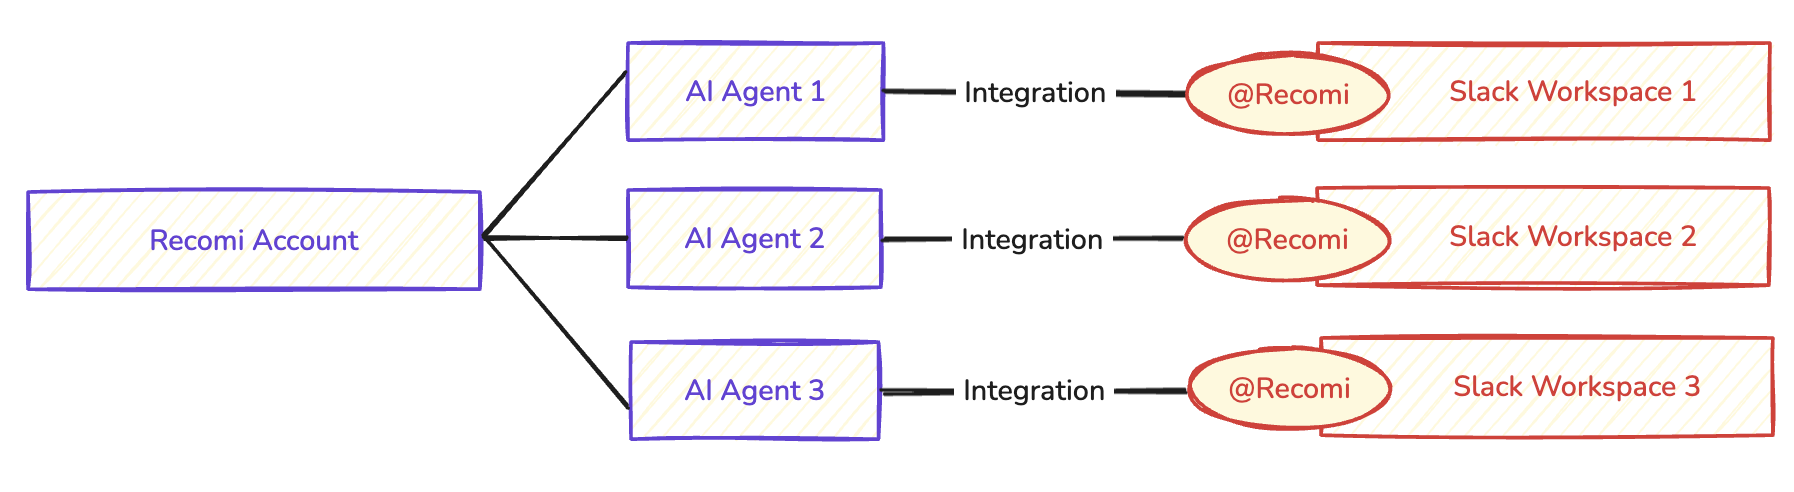
Integrating Recomi into Slack unlocks AI-powered support for your employees. Your employees gain a productivity-boosting bot that enriches the collaboration experience. Get started with your new AI-powered assistant today! Enhanced productivity and automation are just one message away.