> ## Documentation Index
> Fetch the complete documentation index at: https://docs.recomi.powerdrill.ai/llms.txt
> Use this file to discover all available pages before exploring further.
# Add Recomi AI Agent to Google Chrome Extension
> Follow this step-by-step guide to seamlessly add a Recomi AI agent to Google Chrome Extension.
You can add a Recomi AI agent to your Google Chrome Extension by following the steps below. If you'd like to customize a chrome extension, you can refer to our open sourced [Recomi chrome extension](https://github.com/powerdrillai/recomi-chrome-extension). Or you can install and use our Recomi Chrome Extension to load any Recomi AI chatbot on your chrome web browser.
## Step 1: Setting Up Your Recomi AI Agent
Start by logging into your Recomi account. If you don't have an account yet, you can create one for free. After logging in, configure your agent within the Recomi platform by uploading relevant data sources, such as text file, documents, which will help the agent build its knowledge base.
## Step 2: Load the Recomi AI Chatbot in Chrome Extension
### Method 1: Chrome Extension Store
[Visit in Chrome Extension Store](https://chromewebstore.google.com/detail/recomi-ai-chatbot/aafpkknfocakijlagjkckaeecjgbckoa)
### Method 2: Load in Developer Mode Locally
* Go to Chrome browser extension management, you can directly access [chrome://extensions/](chrome://extensions/)
* Enable **Developer mode** and click **Load unpacked extension**
 * Then open the root directory of the extension source file
* third-party
* chrome plug-in
* content.js Floating button JS script
* favicon.png Extension icon
* manifest.json Extension description file
* options.css Extension configuration page style file
* options.html Extension configuration static HTML page
* options.js Extension configuration JS script
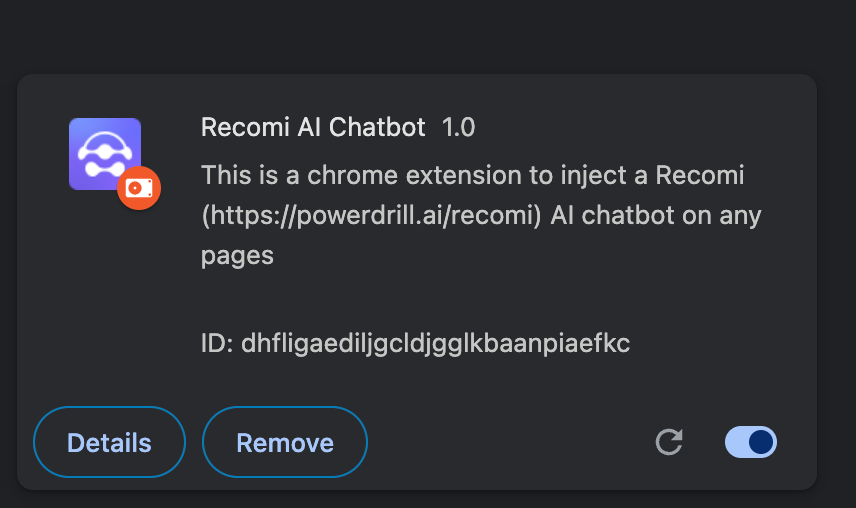
The following image shows that the extension has been loaded successfully.
* Then open the root directory of the extension source file
* third-party
* chrome plug-in
* content.js Floating button JS script
* favicon.png Extension icon
* manifest.json Extension description file
* options.css Extension configuration page style file
* options.html Extension configuration static HTML page
* options.js Extension configuration JS script
The following image shows that the extension has been loaded successfully.
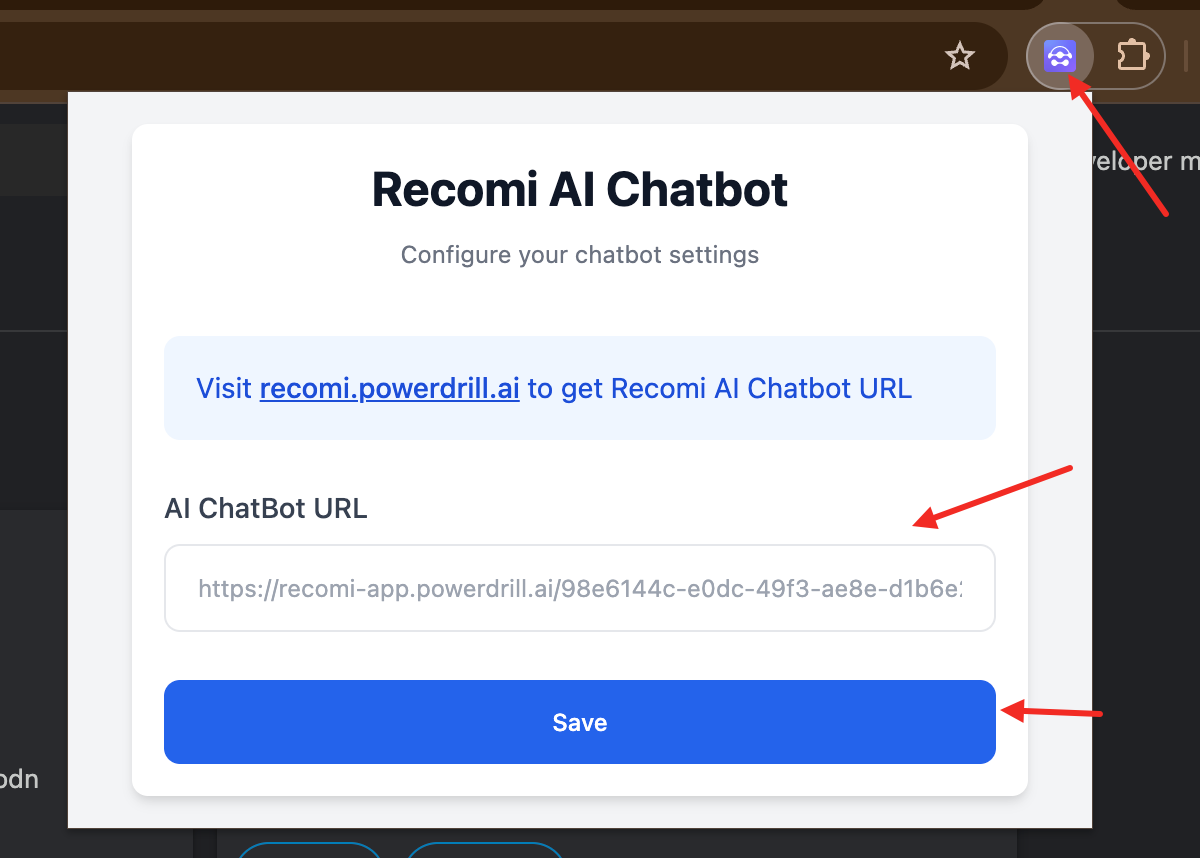
 Then you can open the extension as shown below:
 ### After importing the extension, subsequent configurations are the same
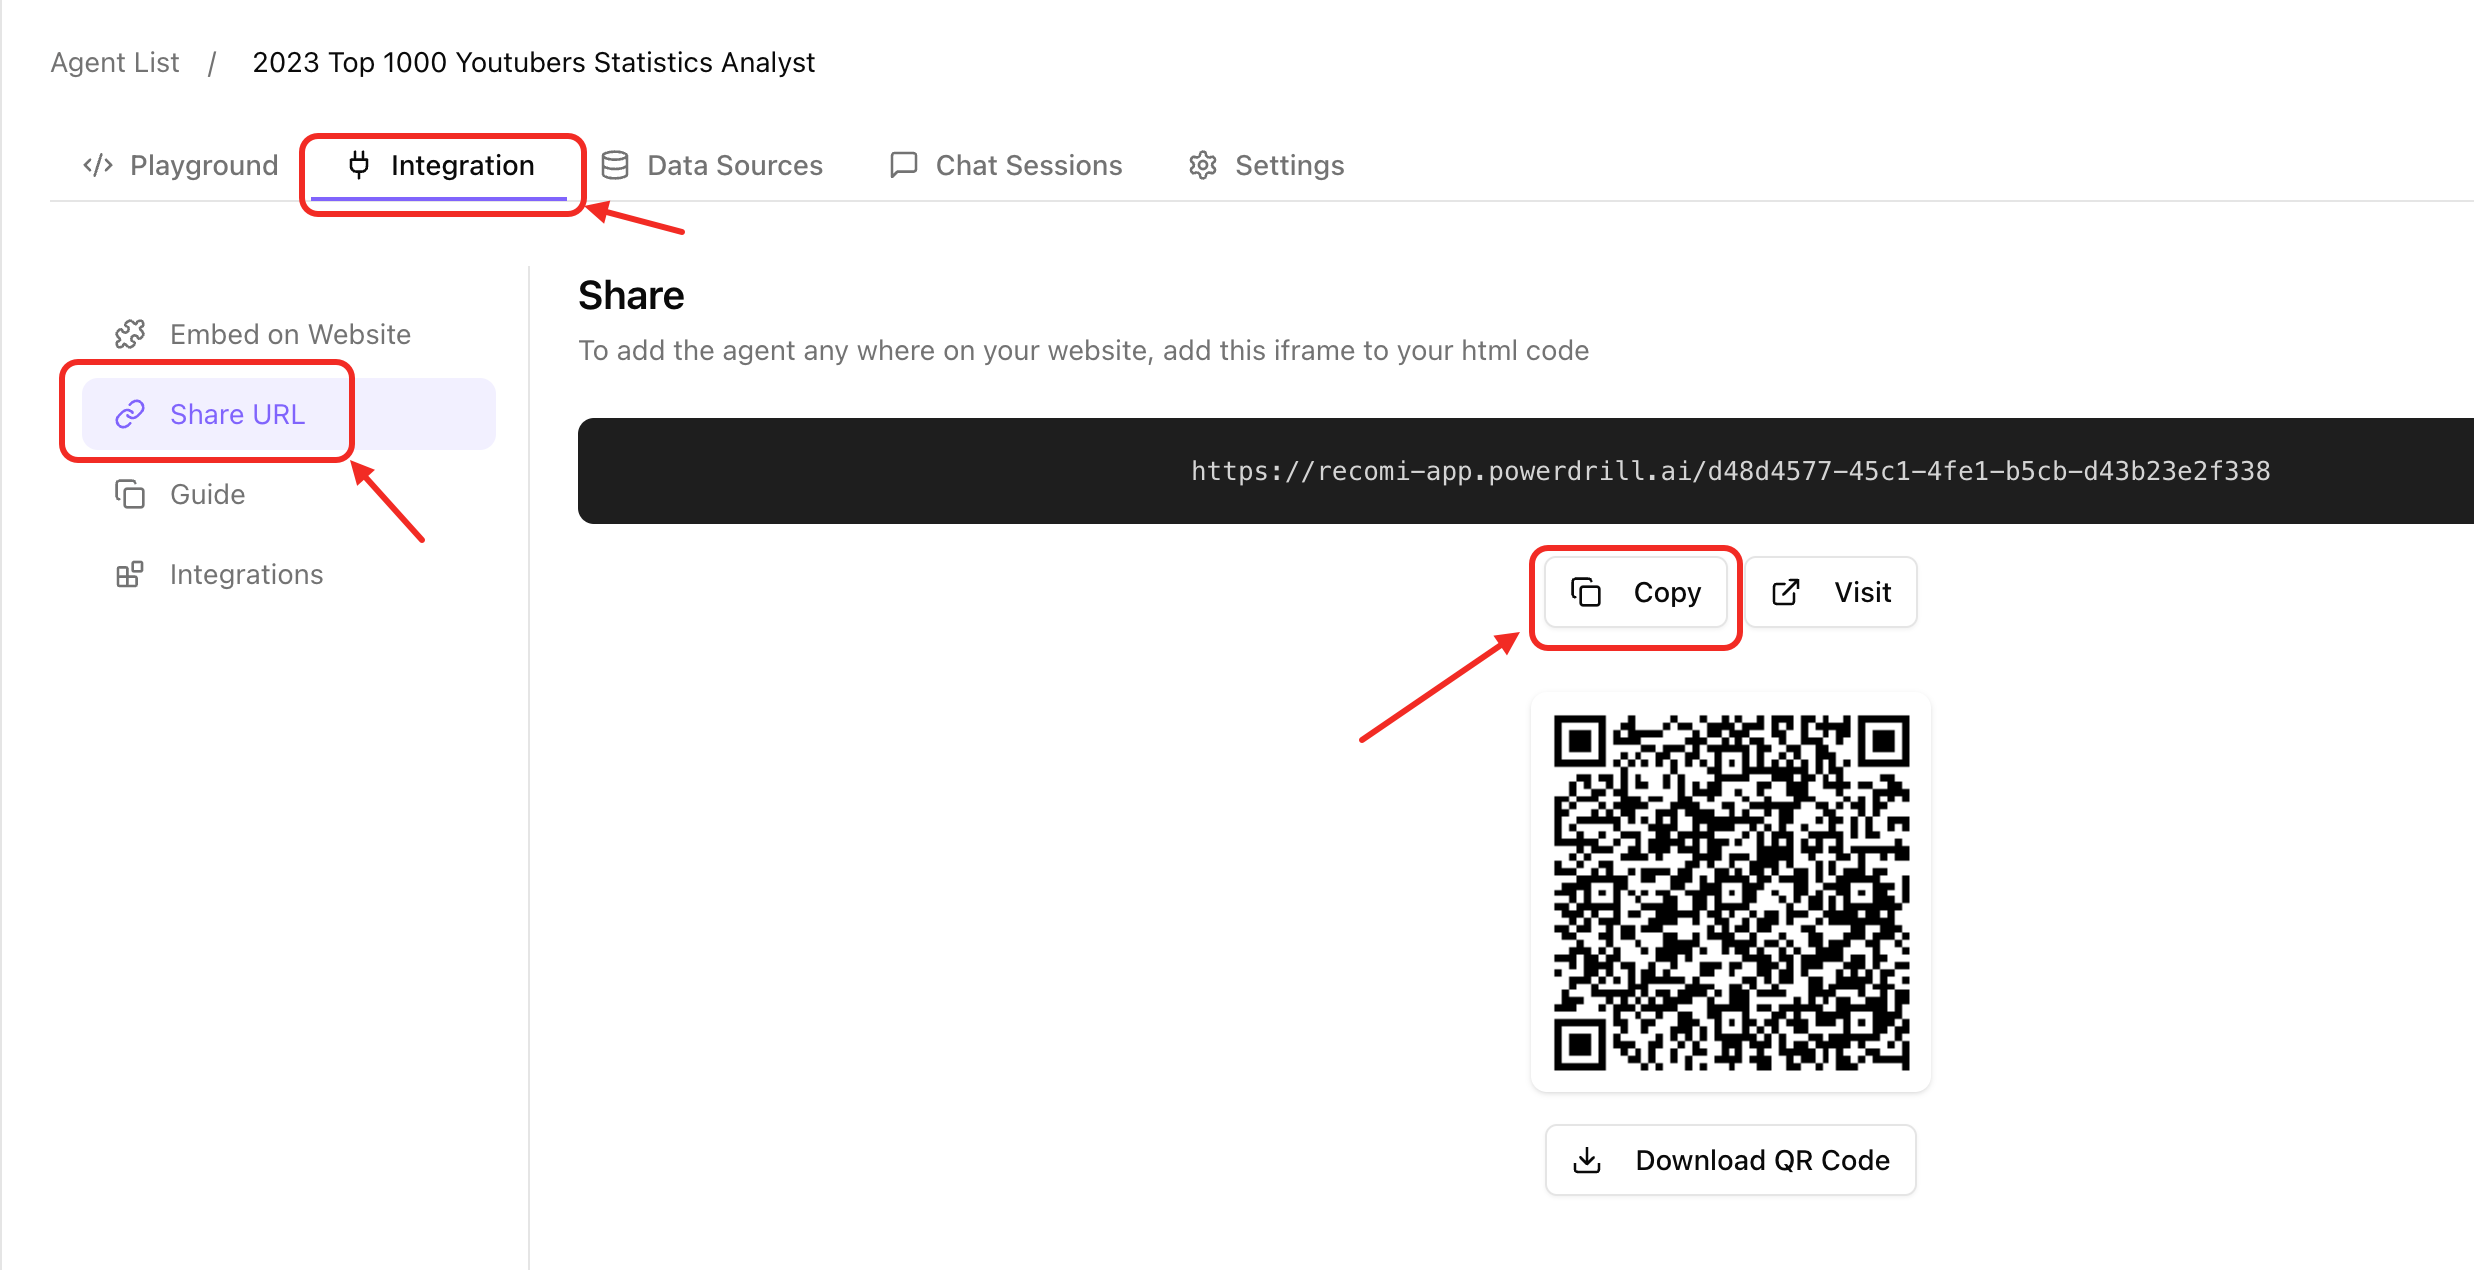
* Create or find your Recomi AI Agent, go to the Agent page -> **Integration** -> **Share URL**, click the **Copy** button to get the ChatBot URL, as shown in the figure
### After importing the extension, subsequent configurations are the same
* Create or find your Recomi AI Agent, go to the Agent page -> **Integration** -> **Share URL**, click the **Copy** button to get the ChatBot URL, as shown in the figure
 * Paste the Recomi AI chatbot URL and click "Save" and confirm the prompt to successfully configure
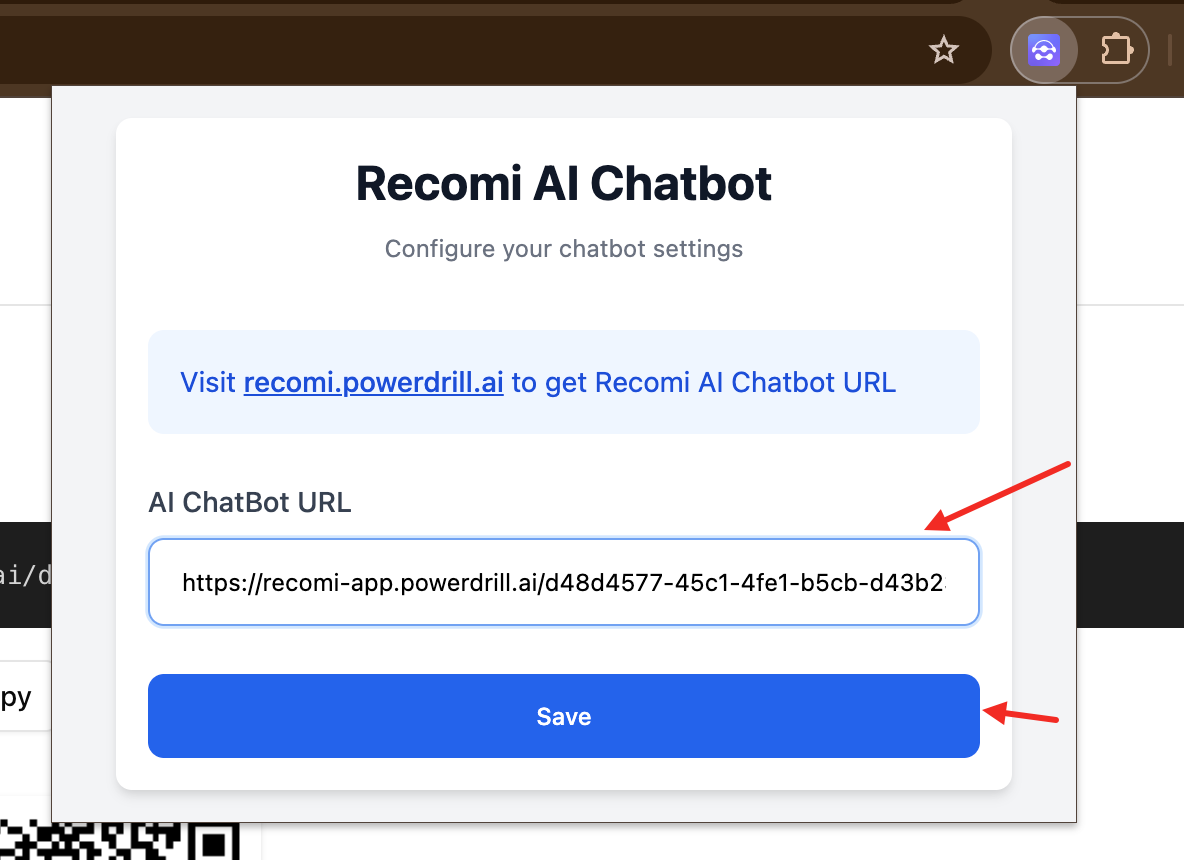 * Restart the browser to ensure that all pages are refreshed successfully
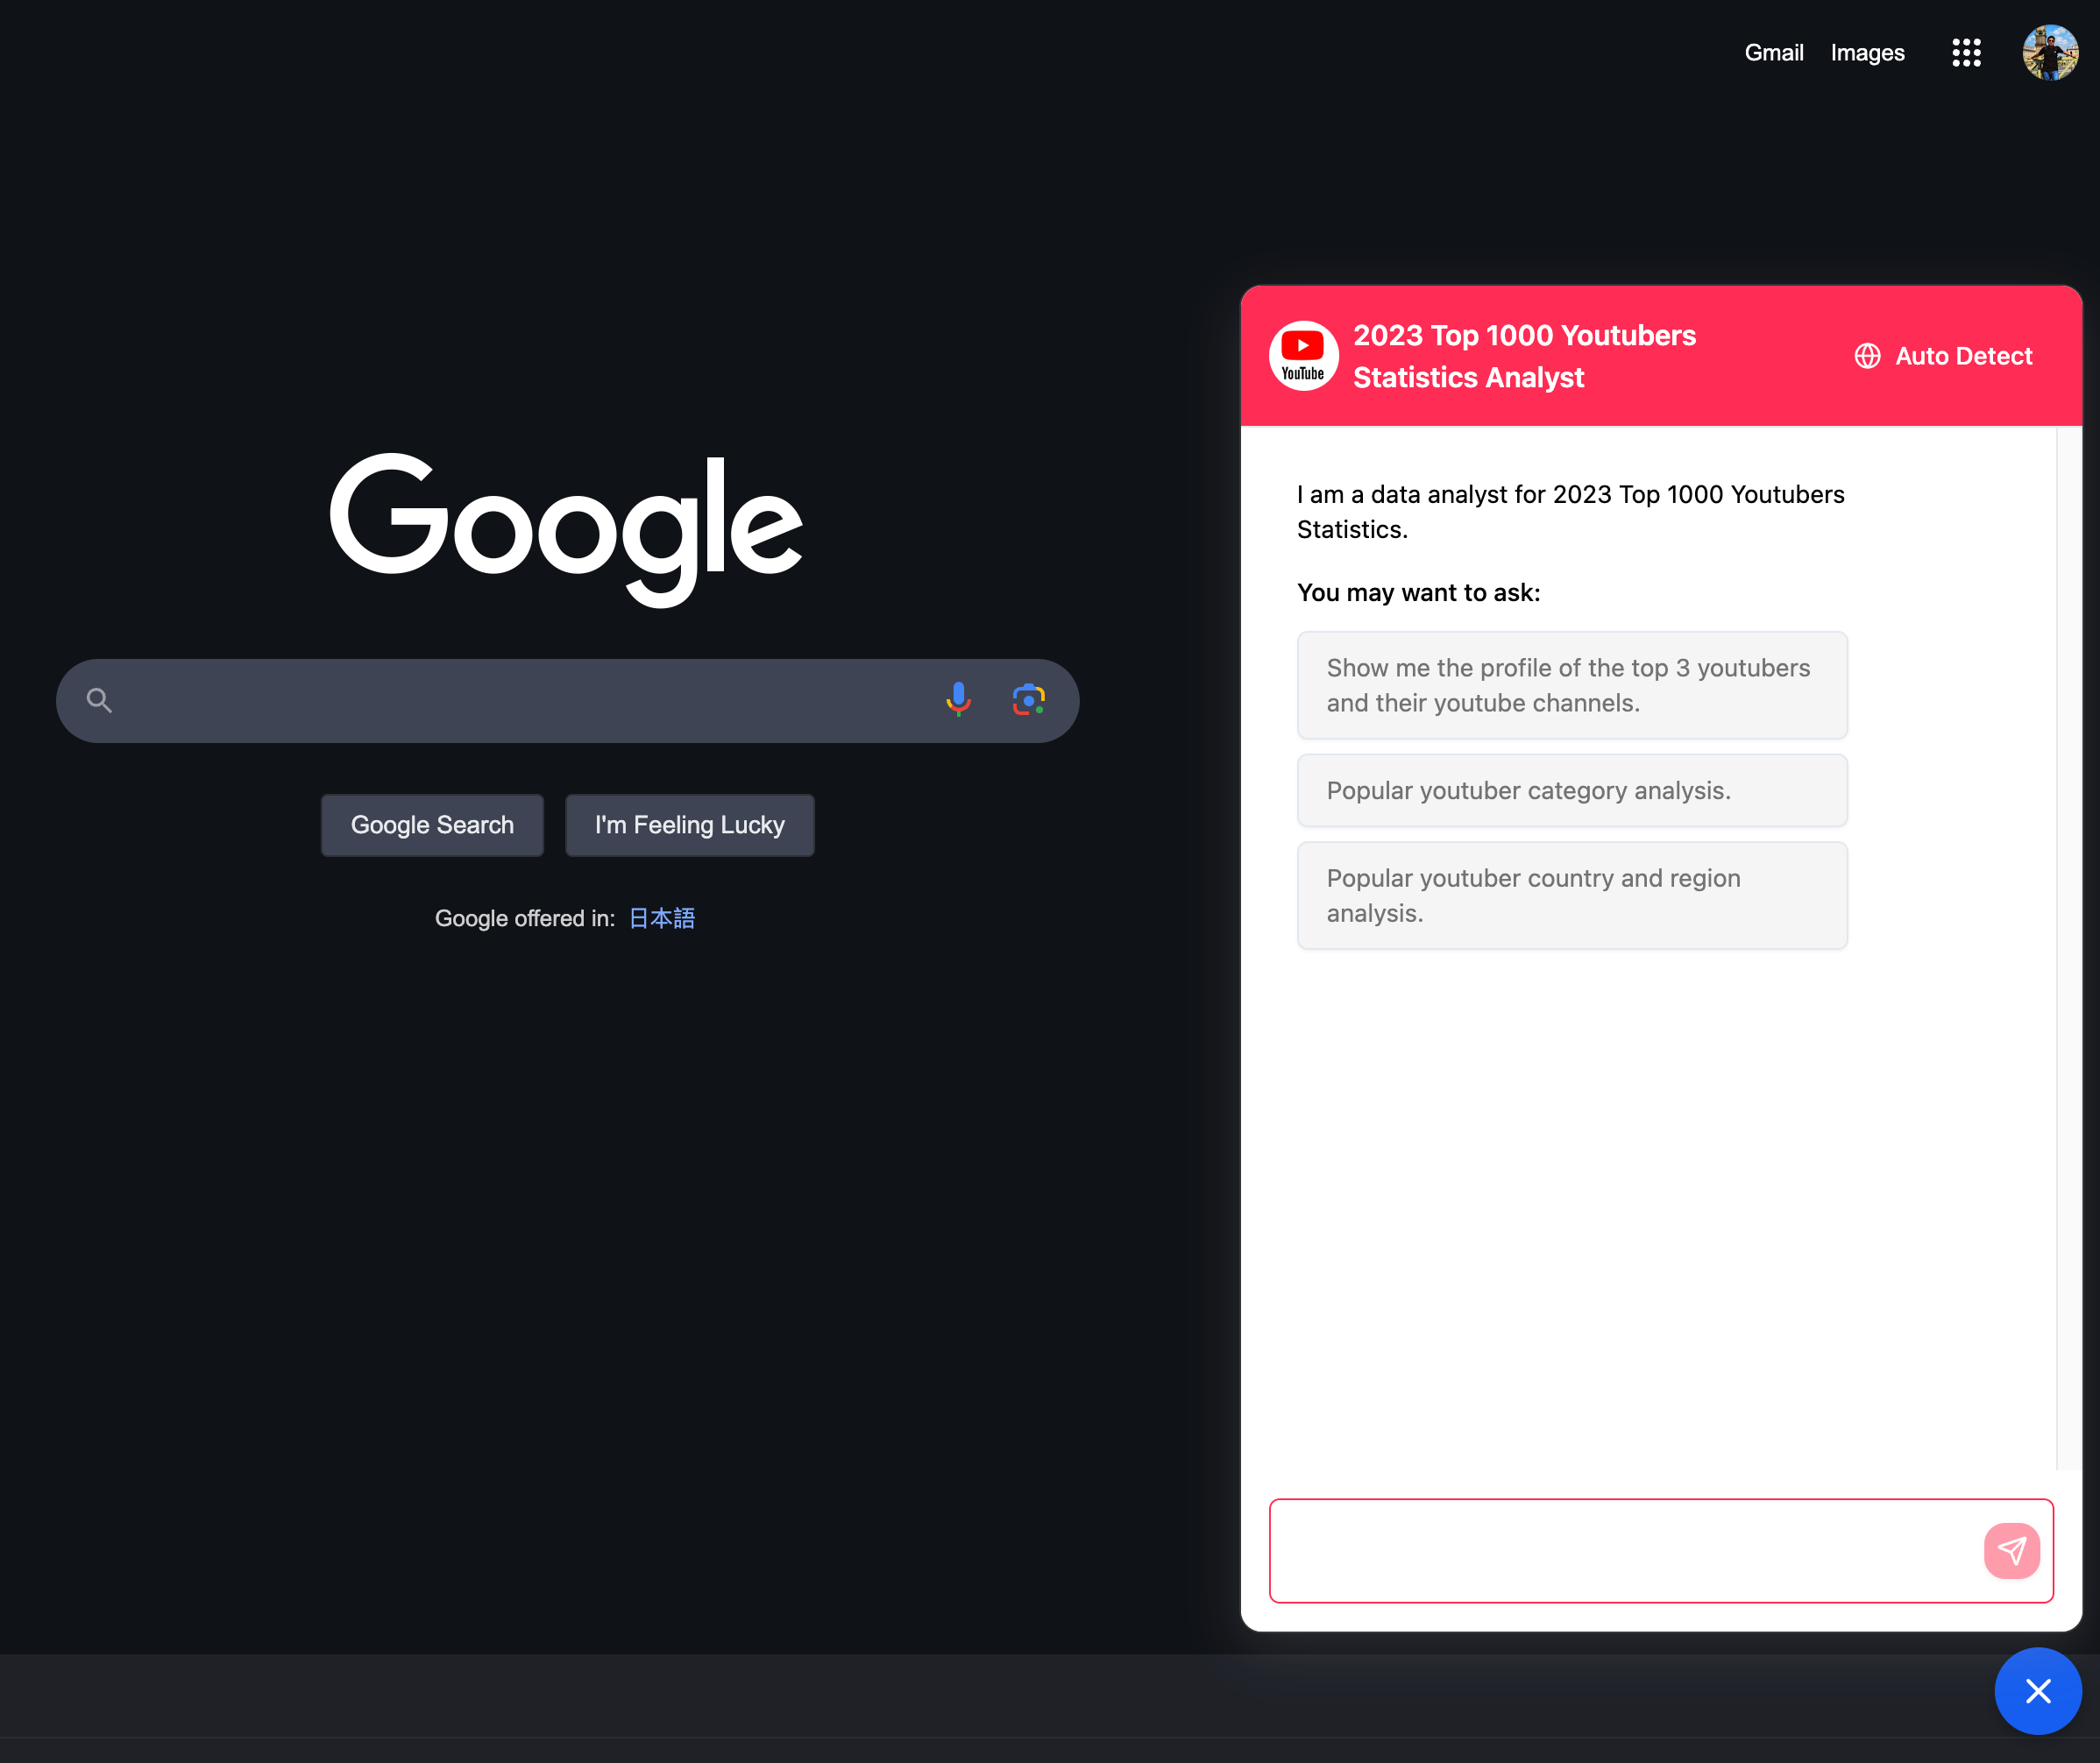
* Recomi AI chatbot floating bar can be loaded normally on any page in Chrome, if you need to change the chatbot, just change the ChatBot URL
* Restart the browser to ensure that all pages are refreshed successfully
* Recomi AI chatbot floating bar can be loaded normally on any page in Chrome, if you need to change the chatbot, just change the ChatBot URL